
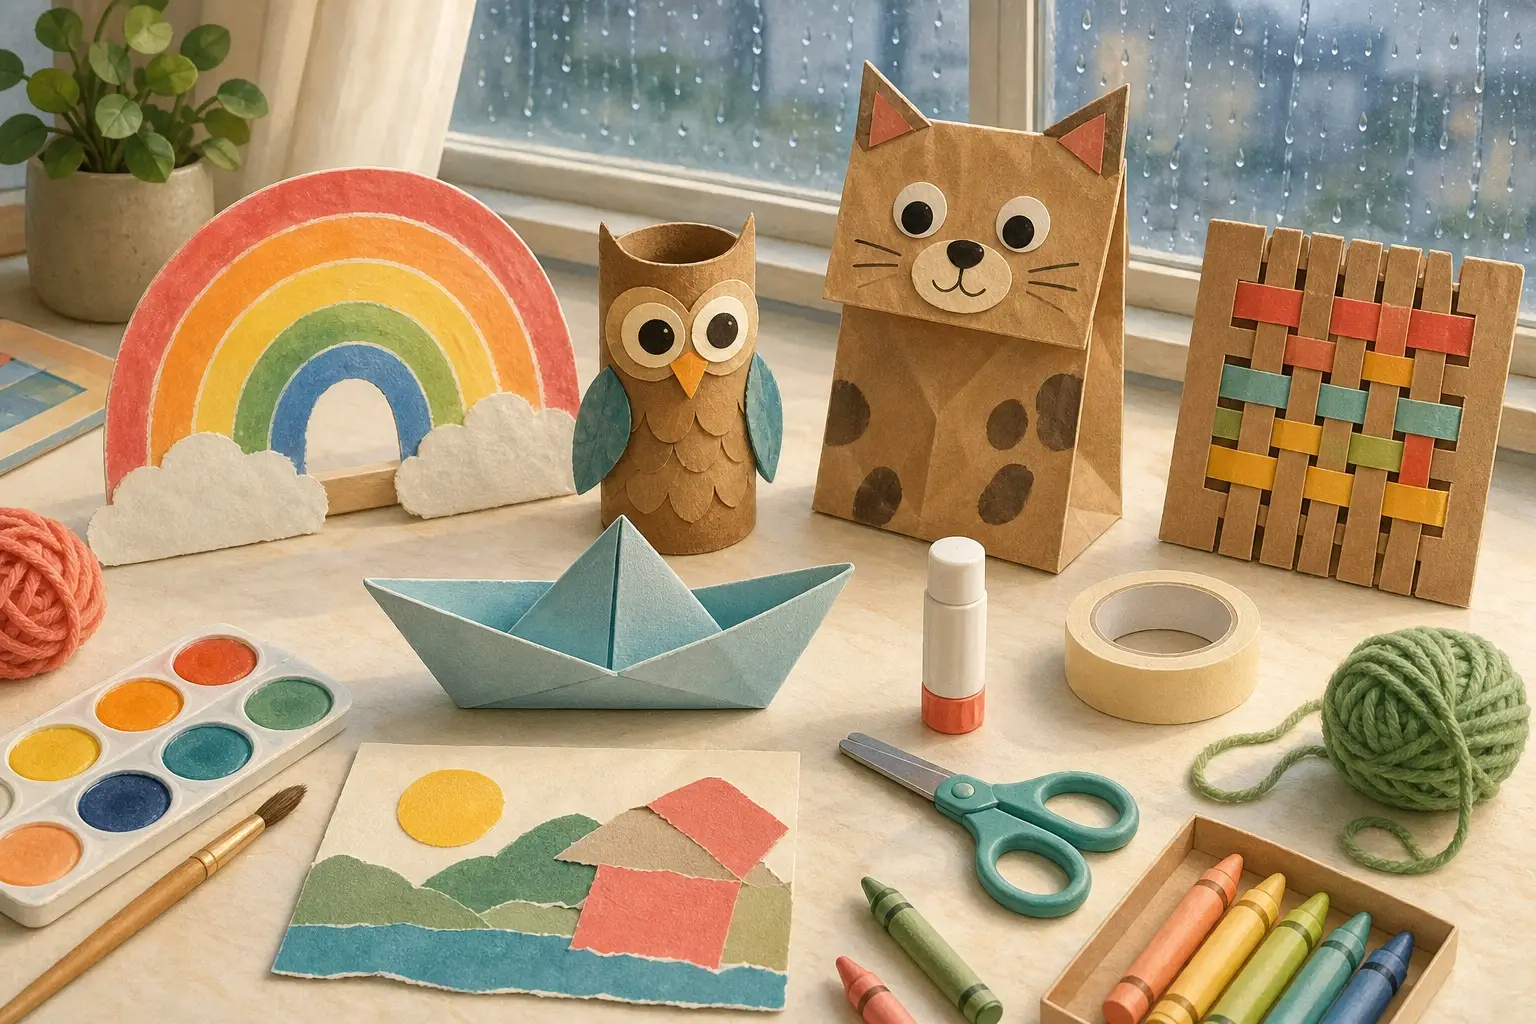
A rainy afternoon does not need a new kit or a cupboard full of coordinated supplies. The most useful craft material is often the thing already headed for recycling: a cereal box, paper bag, cardboard tube or clean egg carton. Pair one of those with paper and crayons, and there is enough structure to begin without deciding the entire outcome for the child.
This list is designed for a real family table. Every idea has a short supply list, a clear first step and an easier substitution. None requires glitter, resin, a craft knife in a child’s hand or a hot-glue gun. Choose the project that fits the materials and attention available today; there is no need to work through the list in order. For forts, games and pretend play beyond crafting, see our screen-free activities for kids, organized by age.
Before you start: make a small rainy-day craft station
Cover the table with scrap paper, a reusable cloth or a washable tray. Put out only what the chosen project needs, plus a bowl for scraps. A smaller material selection is easier to understand and easier to clean than an open cupboard.
For children through elementary age, the U.S. Consumer Product Safety Commission’s art and craft safety guide recommends supplies intended for children, close supervision, small working amounts, food and drinks kept away from the art area, and handwashing afterward. It also advises avoiding solvent-based, dusty, unlabeled and warning-labeled materials. The American Academy of Pediatrics suggests looking for ASTM D4236 wording and an Approved Product seal when choosing children’s art materials.
“Non-toxic” does not mean edible. Read each label, follow its age guidance and stop if a material irritates skin or breathing. An adult should cut thick cardboard, remove staples and control any sharp or hot tool. Keep yarn loops, small scraps and detachable pieces away from babies and children who still mouth objects.
A basic supply basket
You do not need everything on this list. Gather what is already available:
- plain or used-on-one-side paper
- crayons, colored pencils or child-labeled washable markers
- a glue stick and masking or painter’s tape
- rounded-tip child scissors for a child who is ready to use them
- clean cereal boxes, paper bags, cardboard tubes and egg cartons
- yarn, string or ribbon offcuts
- child-labeled washable paint and one brush or sponge
- a ruler, hole punch and pencil for adult setup
If a project calls for something you do not have, use the substitution in that section or move to the next idea. The goal is to start making, not to recreate a perfect example.
Paper crafts with almost no setup
1. Paper plate rainbow
You need: a paper plate or a circle cut from a cereal box, crayons or washable paint, scrap paper, glue or tape.
Cut the circle in half and remove a small arch from the straight edge to make a rainbow shape. Let the child add broad color bands. Tear or crumple pale scrap paper for clouds and attach them at the bottom.
No plate? Trace around a mixing bowl on thin cardboard. The colors do not need to follow a traditional rainbow; choosing an unusual palette is part of the project.
2. Torn-paper weather collage
You need: scrap paper in any colors, one background sheet, a glue stick.
Tear paper into long strips for rain, round pieces for clouds and jagged shapes for lightning. Arrange everything before gluing, then overlap the pieces to build a storm, a rainbow after rain or an imaginary weather map.
Tearing is the technique, so scissors are optional. Used envelopes, paper shopping bags and the unprinted inside of packaging add useful texture without buying collage paper.
3. Folded paper boat fleet
You need: rectangular paper, crayons or pencils.
Fold a simple paper boat, then give it a flag, windows, a captain or a cargo drawn directly on the paper. Make a second boat in a different size and invent names, destinations or a rescue story for the fleet.
Keep the boats dry for longer play. If you float them, use a shallow basin on the floor with an adult beside it, and recycle soggy paper afterward rather than expecting the craft to last.
4. Shape-animal pictures
You need: paper scraps, a background sheet, crayons, glue.
Cut or tear a small group of basic shapes: circles, rectangles, triangles and long strips. Ask what animal those pieces could become. Move the shapes around until a creature appears, glue them down and draw the missing face, legs or habitat.
For younger makers, an adult can prepare a few large shapes. Older children can challenge themselves to use the same five shapes in two completely different animals.
5. One-page paper chain creature
You need: one sheet of paper, scissors, tape or glue, a crayon.
Cut the sheet into wide strips and join them into a short chain. Turn the first loop into a face and the last into a tail. It can be a caterpillar, snake, dragon or a creature with no existing name.
Use wide loops rather than tiny links. A paper chain is a decoration, not a necklace; keep it away from sleeping spaces and very young siblings.
6. Paper crown from a grocery bag
You need: a clean paper grocery bag or cereal-box strip, crayons, tape, paper scraps.
An adult cuts a wide band long enough to sit loosely around the child’s head. Decorate it flat with drawn jewels, paper feathers or weather symbols, then tape the ends only after checking the fit.
The crown can belong to a story character rather than the child. If headwear is uncomfortable, keep the band open and display it as a royal banner.
7. Rainy-window picture frame
You need: two sheets of paper, crayons, tape, scissors for adult setup.
On one sheet, draw an outdoor rainy scene. Fold the second sheet in half and have an adult cut a large window opening, leaving a sturdy border. Draw curtains, plants or a pet on the border, then tape the frame over the scene.
For a changing picture, tape only the side edges and slide different weather scenes behind the same window.
Cardboard and clean-recycling crafts
8. Cardboard-tube owl
You need: a clean cardboard tube, paper scraps, crayons, glue or tape.
Press the top rim inward from two sides to suggest pointed ear tufts. Add large paper eyes, a triangle beak and two wings. Draw feathers directly on the tube or layer broad paper scallops.
If the tube is too stiff to fold, leave it round and attach paper ears. Do not use tubes with food grease, bathroom contamination or sharp torn edges.
9. Paper bag puppet
You need: a clean lunch-size paper bag, paper, crayons, glue or tape.
Place the folded bag with the flap facing up. Make the flap the puppet’s mouth, then add eyes, ears, hair or antennae. Draw a different expression inside the open mouth for a surprise when the puppet “talks.”
No paper bag? Fold a sheet around a hand and tape the side into a loose sleeve. Remove any handles or long cords before giving a shopping bag to a child.
10. Cereal-box weaving
You need: flat cereal-box cardboard, yarn or paper strips, scissors, tape.
An adult cuts a sturdy rectangle and makes evenly spaced notches along the top and bottom. Wrap yarn vertically between the notches to form the warp. Weave thick yarn or paper strips over one strand and under the next, alternating the starting direction on each row.
Tape the first end to the back so it cannot slip. Wide spacing and shoelace-thick strands are easier than a dense miniature loom.
11. Egg-carton flower garden
You need: a clean paper egg carton, paper or cardboard stems, crayons or washable paint, glue or tape.
An adult separates the carton cups and trims away rough points. Color each cup as a flower, sun or fanciful plant. Attach broad cardboard stems and arrange the pieces on a cereal-box background.
Use paper cartons rather than foam when possible, and discard cartons that are damp, dirty or difficult to clean safely.
12. Tissue-box creature
You need: an empty tissue box, paper, crayons, tape.
Turn the opening into a mouth. Add paper teeth, eyes, ears, fins or feet, then decide what the creature eats: paper “cookies,” drawn feelings, pretend letters or scraps collected during cleanup.
An adult should remove any remaining plastic film and check the opening for sharp glue or cardboard edges. A small shoe box with a paper mouth cut into its lid works too.
13. Cardboard-box mini town
You need: one or more small boxes, crayons or paper scraps, tape.
Stand boxes upright as buildings. Draw doors and windows instead of cutting them, then add signs made from symbols, rooftop gardens and roads on flattened cardboard. Paper tubes can become trees or towers.
Build only three places to begin—a home, a shop and one surprising destination. A compact town leaves room for storytelling instead of turning setup into the whole afternoon.
Paint, crayon and printmaking ideas
14. Crayon texture hunt
You need: thin paper, peeled crayons, textured household surfaces.
Place the paper over a safe, stable texture and rub the side of a crayon across it. Try corrugated cardboard, a woven placemat, a coin held flat by an adult or the grain of an unfinished cardboard box. Cut or tear the rubbings into collage shapes.
Avoid walls, painted furniture, hot radiators and anything sharp or dirty. Test one small area and hold loose objects so they cannot slide.
15. Wax-resist rain picture
You need: white or pale crayon, paper, child-labeled watercolor or very thin washable paint.
Draw umbrellas, raindrops, secret messages or cloud patterns firmly with crayon. Brush watery color over the page and watch the wax marks resist the paint.
No paint? Rub a darker crayon lightly over the pale drawing. The contrast is softer, but the hidden lines still emerge.
16. Tape-resist city skyline
You need: paper, low-tack masking or painter’s tape, crayons or washable paint.
Place short tape strips as building edges, roads or window grids. Color across the whole page. When the color is dry, an adult slowly peels the tape back on itself to reveal clean lines.
Press the tape onto clothing once before using it on delicate paper to reduce its grip. If the paper begins to tear, leave the tape in place and treat it as part of the collage.
17. Kitchen-sponge stamps
You need: a new or craft-only sponge, child-labeled washable paint, paper, a shallow plate.
An adult cuts the sponge into a few large geometric shapes. Dab one flat side into a small amount of paint, press it onto paper and repeat the shapes to build flowers, robots, houses or repeating patterns.
A folded scrap of corrugated cardboard can stamp lines if there is no spare sponge. Never use a sponge that has held cleaning chemicals.
18. String-pull rain trails
You need: short pieces of thick yarn, child-labeled washable paint, paper, a tray.
Dip part of a short yarn piece into a small puddle of paint, leaving one end clean to hold. Lay it in loops on one half of a folded sheet, close the paper, press gently and pull the yarn out by the dry end. Open the page to see the mirrored trail.
Use several short strands rather than one long cord, supervise closely and discard paint-soaked yarn after the activity. A narrow strip of scrap paper dragged through paint makes a simpler alternative.
19. Cardboard-edge printing
You need: corrugated cardboard scraps, washable paint, paper.
An adult cuts cardboard into palm-size pieces. Dip a corrugated edge lightly in paint and stamp lines, grids, waves and zigzags. Turn the marks into a rainy skyline, maze, robot or abstract pattern after they dry.
This works best with a thin paint layer; a large puddle hides the corrugated pattern. Crayon traced along the cardboard edge is the no-paint version.
Yarn and fabric crafts
20. Yarn-wrapped cardboard shape
You need: sturdy cardboard, thick yarn, tape, scissors for adult setup.
An adult cuts a simple heart, cloud, fish or first initial with rounded corners. Tape one yarn end to the back, then wrap across the shape in different directions. Tape the final end at the back rather than tying a tight loop.
Make a few shallow edge notches if the yarn slides. Fabric strips cut by an adult from an old T-shirt can replace yarn and are easier to grip.
21. Paper plate lacing picture
You need: a paper plate or cardboard circle, a hole punch, thick yarn or a shoelace, crayons.
An adult punches a small number of widely spaced holes. Draw a web, sun, flower or round monster, then lace through the holes to add rays, petals or a crisscross center. Tape the yarn end to the back when finished.
Keep the working strand short enough to manage, and supervise because cord can tangle around fingers or furniture. For younger makers, use a stiff shoelace and fewer holes.
22. Twisted-yarn friendship cord
You need: two short yarn colors, scissors, tape.
An adult cuts equal lengths and tapes one end securely to the table. Twist both strands together in one direction, fold the twisted length in half and let the two sides curl around each other. Tie or tape the ends to make a bookmark, zipper pull or decoration.
Do not size it as a necklace, and remove any wearable cord that feels tight or catches during play. Paper clips made from folded card can hold the ends if knotting is frustrating. A child who enjoys this may be ready for one of the friendship bracelet kits for kids and tweens we compare by age guidance and technique.
23. No-sew sock puppet
You need: one clean unmatched sock, paper scraps, crayons, masking tape.
Slide the sock over a hand and mark where the face feels natural. Remove it, then tape on broad paper ears, eyes or hair. Put the puppet back on only after checking that every piece is secure and comfortable.
Draw features on a paper band that wraps around the sock if tape will not stick to the fabric. Skip buttons, beads and pins; paper details are lighter and avoid tiny hard parts.
Crafts that turn into imaginative play
24. Cereal-box puppet theater
You need: a cereal box, paper puppets, crayons, tape, craft sticks or folded cardboard handles.
An adult cuts a large stage opening in one side of the box and covers every cut edge with tape. The child decorates scenery on the back wall and makes broad paper characters with cardboard handles taped behind them.
Set the theater on a table and move puppets from the sides. Avoid long skewers and do not put fingers through tight cut openings.
25. Rainy-day shoebox diorama
You need: a shoe box or shallow carton, paper scraps, crayons, tape or glue, leftovers from earlier crafts.
Turn the box on its side and choose one small world: a room during a storm, a forest after rain, an underwater town or a weather station on a cloud. Draw the background, fold paper figures with small base tabs and arrange them without gluing first. Add only the pieces that help tell the scene’s story.
This is a useful last craft because it can absorb spare shapes, cardboard, yarn and painted paper from the other projects. Stop when the scene feels playable; filling every empty space is not required.
How to choose the right craft today
Use the child’s current mood and the household’s available energy, not just age, to narrow the list:
- For the quickest start: torn-paper weather collage, shape animals or crayon texture rubbings.
- For a child who wants a recognizable result: paper plate rainbow, cardboard-tube owl or paper bag puppet.
- For repeated, focused motions: cereal-box weaving, yarn wrapping, plate lacing or sponge stamping.
- For siblings working together: cardboard-box town, puppet theater or shoebox diorama.
- For almost no wet cleanup: paper boats, paper chains, a crown, cardboard town or yarn wrapping.
- For a child asking to paint: wax resist, sponge stamps, string pulls or cardboard-edge printing.
If the child rejects the example, keep the technique and change the subject. A paper plate does not have to become a rainbow; it can become a moon, pizza, beetle or imaginary map. A cereal-box loom can hold paper strips instead of yarn. Flexibility is what makes basic materials more useful than a one-outcome kit. When a child does want a boxed project, our craft kits for kids guide compares options by age, mess and skill level, and our air-dry clay kits for kids cover sculpting projects that dry without an oven.
A calmer way to end craft time
Give a short warning before cleanup, then photograph or display one piece and recycle scraps that are not useful. Wet work can dry on the same tray that contained the activity. Store reusable crayons, tape and yarn before clearing the larger cardboard pieces.
Invite the child to choose one unfinished project to keep for tomorrow. That turns stopping into a pause rather than a failure, and it prevents a rainy-day table from becoming a permanent pile. If the household wants a ready-contained option for another day, compare the cleanup trade-offs in our low-mess craft kit guide. For a basic drawing basket instead, see our drawing supplies for kids guide.


